Integration Details
⚠️ Note that steps 4 - 6 are exclusive to the payment page and are not required if working on a non-payment page. If you are working on a non-payment page integration, please move to the Enable User Interface Section to display the offers to your customers.
📘 The Flex Pay's Pay Monthly Selector is an embeddable HTML element that will allow the user to select Flex Pay as their preferred method of payment during payment flow.
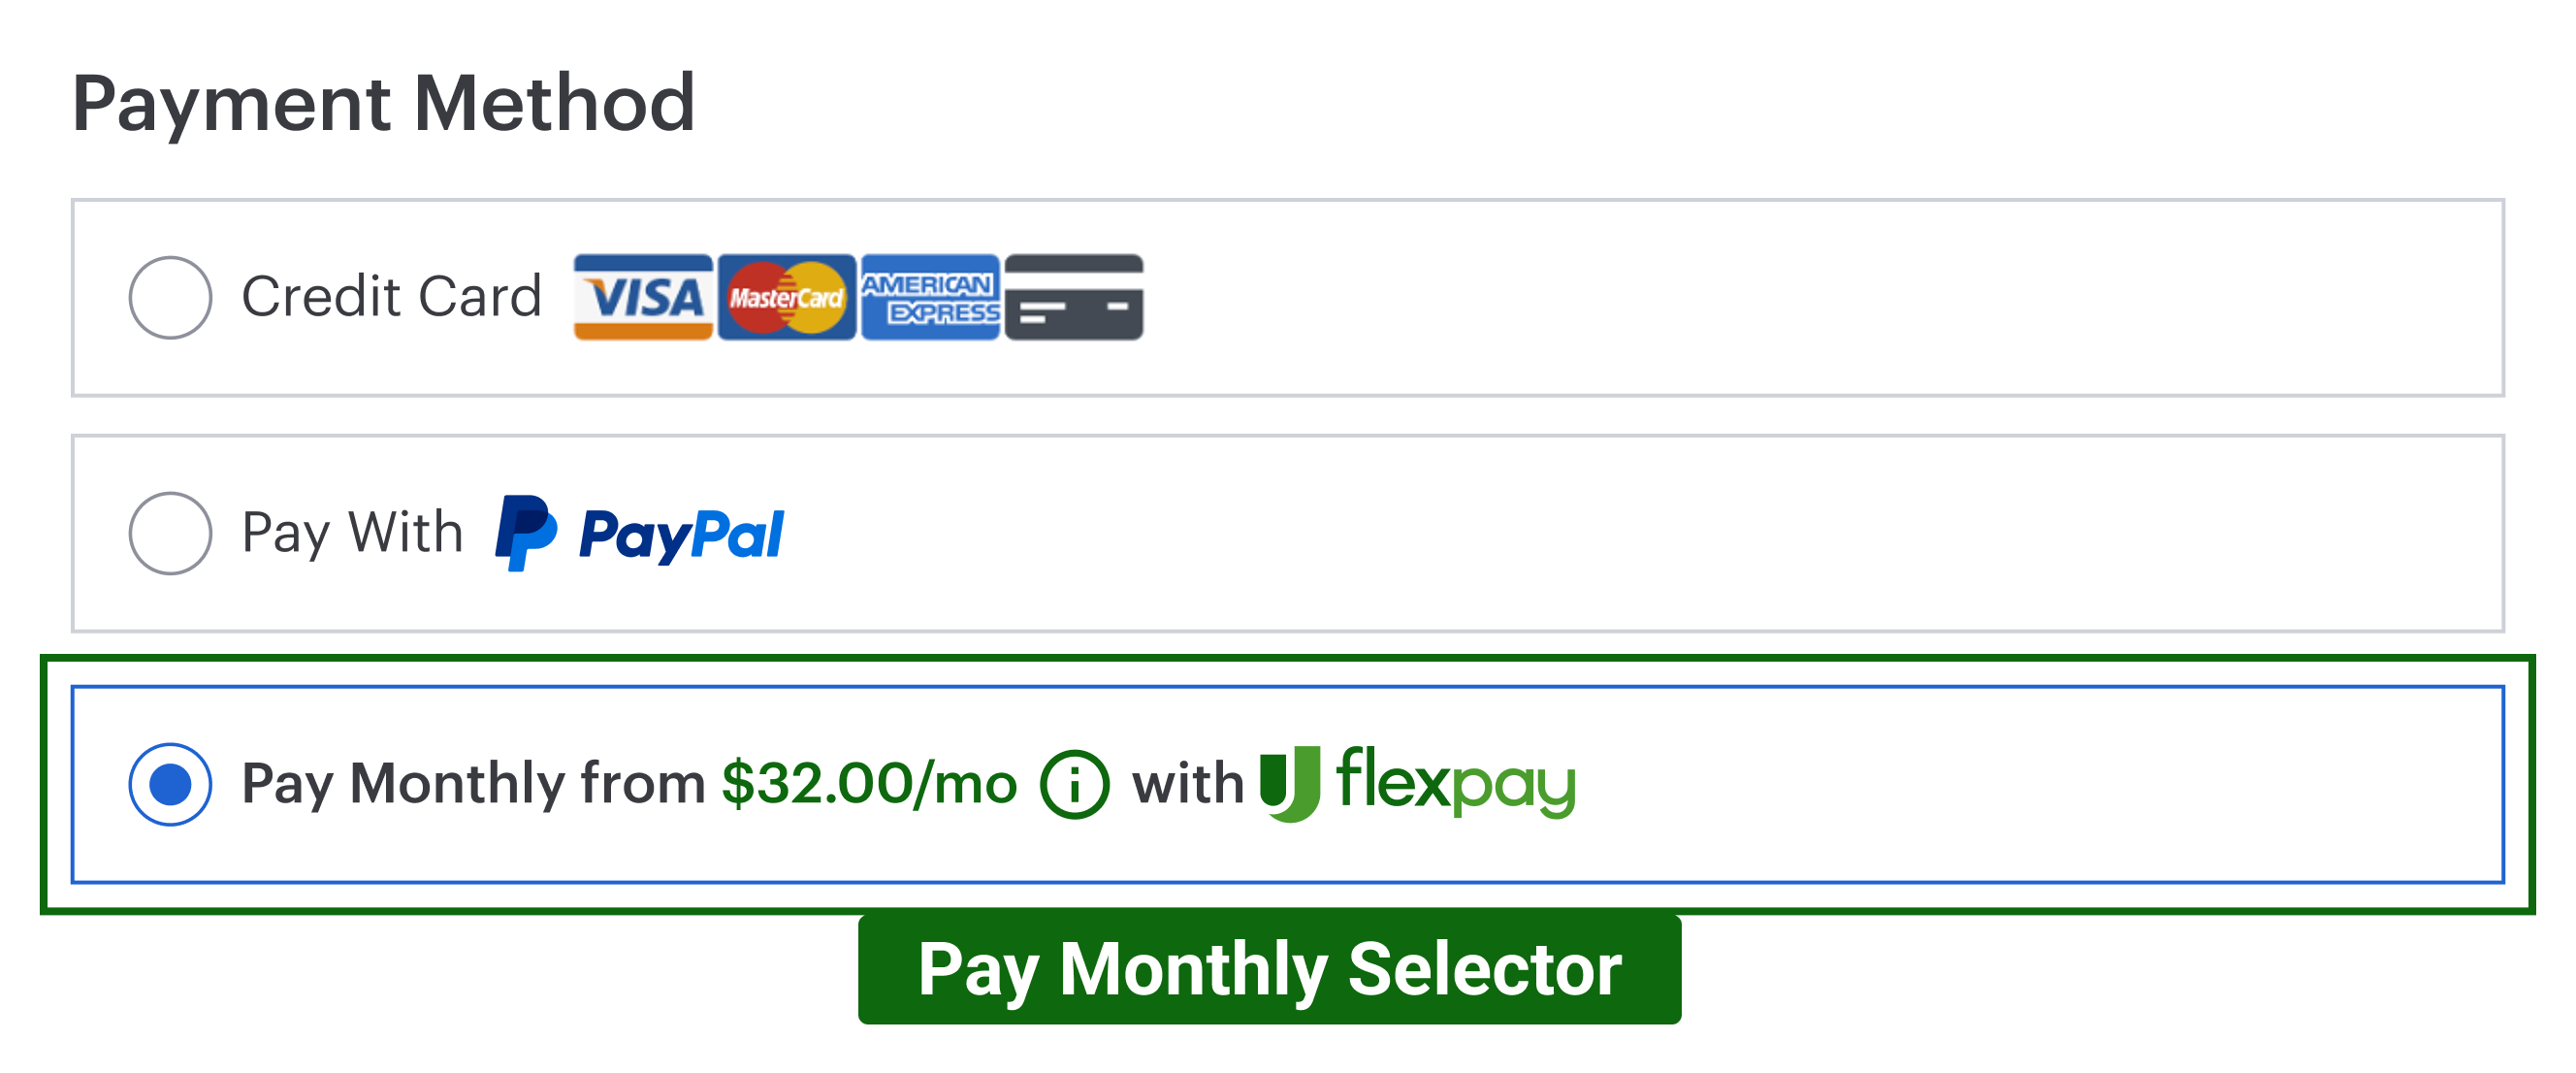
Note that the iFrame, described in the section below, is usually placed under the Payment Selectors. You can find more information on Payment Selectors here.
Pay Monthly iFrame refers to Flex Pay's fully embedded HTML modal that allows the user to apply for Flex Pay’s monthly financing without leaving your site!
To setup the iFrame, prepare a hidden DOM element that can hold the Flex Pay application iFrame as shown below.
<!-- prepare a hidden container for the Uplift application iframe -->
<div id="up-pay-monthly-container" src="" style="display:none"></div>
<!-- you will attach here ^ the Uplift iframe if Pay monthly is available -->
Avoid encapsulating the iFrame inside another iFrame.
⚠️ There are some important considerations when setting up this element:
- The iFrame div unique id is passed into the Uplift initialization parameter
containerfor a payment page referenced earlier in step 2. - Ensure that the container’s height of the viewport is set to maximum since our library is trying to fit it within the viewport.
When the iFrame is loaded on the page, it defaults to a hidden and paused state preventing user interaction.
The library provides two methods to select and deselect the iFrame.
📘 Note that select and deselect functionalities operate independently of window.Uplift.Payments.load(orderInfo). Therefore, executing these functions simultaneously should be avoided. The load function is unnecessary for either the select or deselect operations.
1. Select Pay Monthly
The select function should be ONLY executed when Flex Pay is selected. window.Uplift.Payments.select() will resume the Flex Pay iFrame, but the hide/unhide process should be handled by the partner website. Make sure to unhide the iFrame container (#up-pay-monthly-container) when the select method is executed.
The select function could be necessary on navigation to maintain the selected Flex Pay method when a user opts for Flex Pay, leaves the Payment Page but later navigates back to the Payment Page.
2. Deselect Pay Monthly
The window.Uplift.Payments.deselect() function should be executed ONLY if Flex Pay has been previously selected.
It is important to avoid executing this function during transitions between non-Flex Pay payment methods (i.e. if the user is switching between Credit and Debit options).
window.Uplift.Payments.deselect() is used to deselect and pause the Flex Pay iFrame. Remember to hide the iFrame container (#up-pay-monthly-container) every time the deselect method is executed.
It is our recommendation to select an alternative payment option as default, however if you desire to preserve the previous selection or use Flex Pay payment by default, call window.Uplift.Payments.select() to validate while Pay Monthly is pre-selected.
⚠️ Please reivew the Purchase Button page for a detailed view of the expected behavior.
Step-by-step Validation Guide (Recommended)
- To set up the Pay Monthly iFrame, prepare a hidden DOM element that can hold the Uplift Pay Monthly application iFrame as shown below.
- First, let’s see what will happen if an offer is unavailable to the customer.
- As per Step 4 of the testing example, validate that your
OrderInfoobject’s order amount (that isorderInfo.order_amount) is 1000($10.00). - Refresh the page.
- Open the console and execute
window.Uplift.Payments.select()which will resume the iFrame and the user interaction. Normally, this should be done within the code, however to make this validation easier, we have used the console. Now, you should see the iFrame as shown below on your page where you inserted the HTML snippet. Make sure to unhide the iFrame container(#up-pay-monthly-container)when the select method is executed.
Note: Since the order amount is set to 1000 ($10.00), the order amount is too low as per merchant specific set up (lower than minimum eligible order amount) to qualify for a valid offer and this is what will be shown to your customer.
- As per Step 4 of the testing example, validate that your
- Now that we know what happens in case of an unavailable offer, let’s walk through what happens if an offer is available (that is a valid
OrderInfoobject).- Update the
OrderInfoobject with a valid order amount (that will result in an offer), updateorderInfo.order_amountto 70000 ($700.00). - Next, on a successful Uplift application, the Uplift callback handler will return with a status of
TOKEN_AVAILABLE. To verify this, update the callback handler for theTOKEN_AVAILABLEstatus as shown below. - Refresh the page.
- Open the console and execute
window.Uplift.Payments.select()which will resume the iFrame and the user interaction. Normally, this should be done within the code, however to make this validation easier, we have used the console. Now same as earlier, you should see the iFrame offering Uplift financing as shown below on the page where you inserted the HTML snippet. Make sure to unhide the iFrame container(#up-pay-monthly-container)when the select method is executed.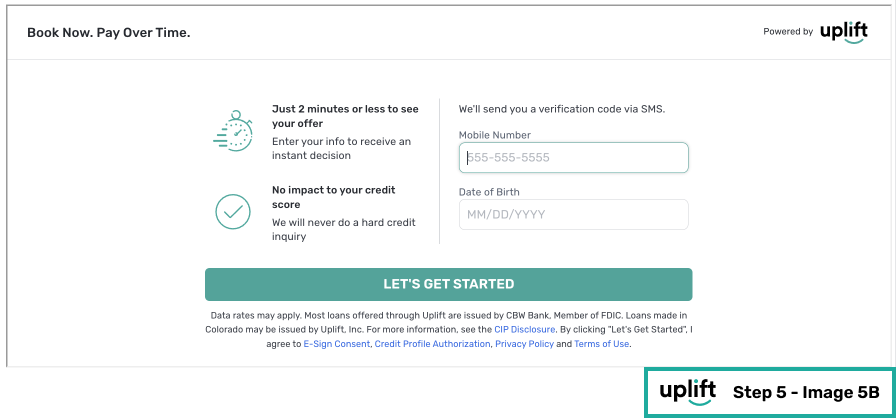
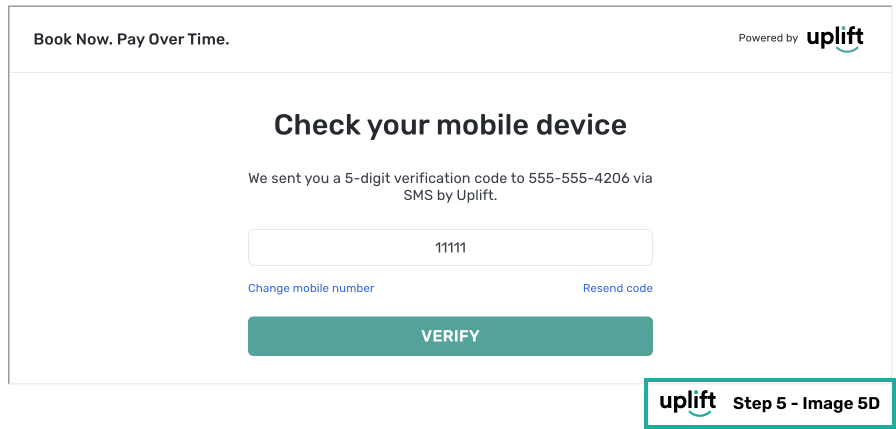
- To ensure end-to-end testing, proceed by completing an Uplift application in the iFrame using the provided testing profiles. For the following steps we will refer to an approved outcome, but feel free to test the unapproved outcome as well.
Note: This 5 digit verification code is also included in the testing profiles.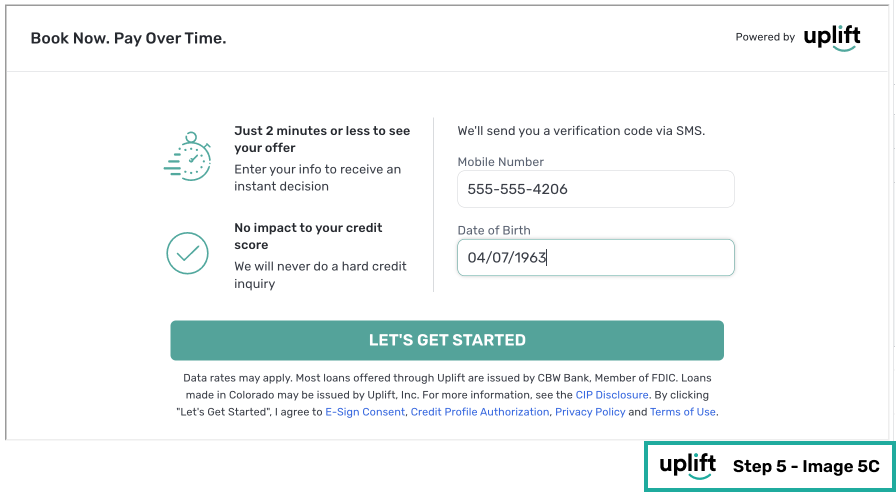
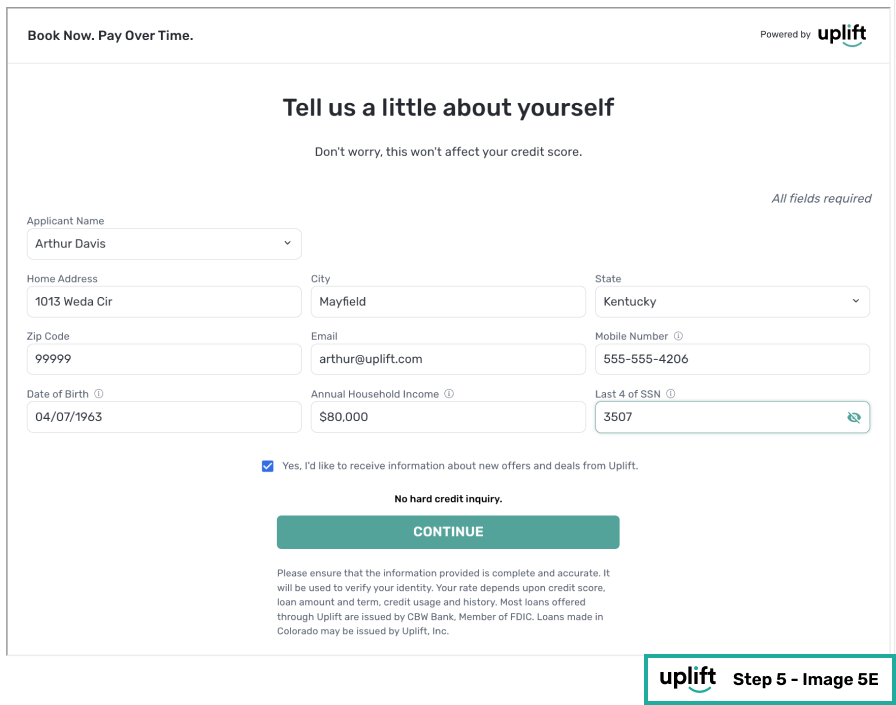
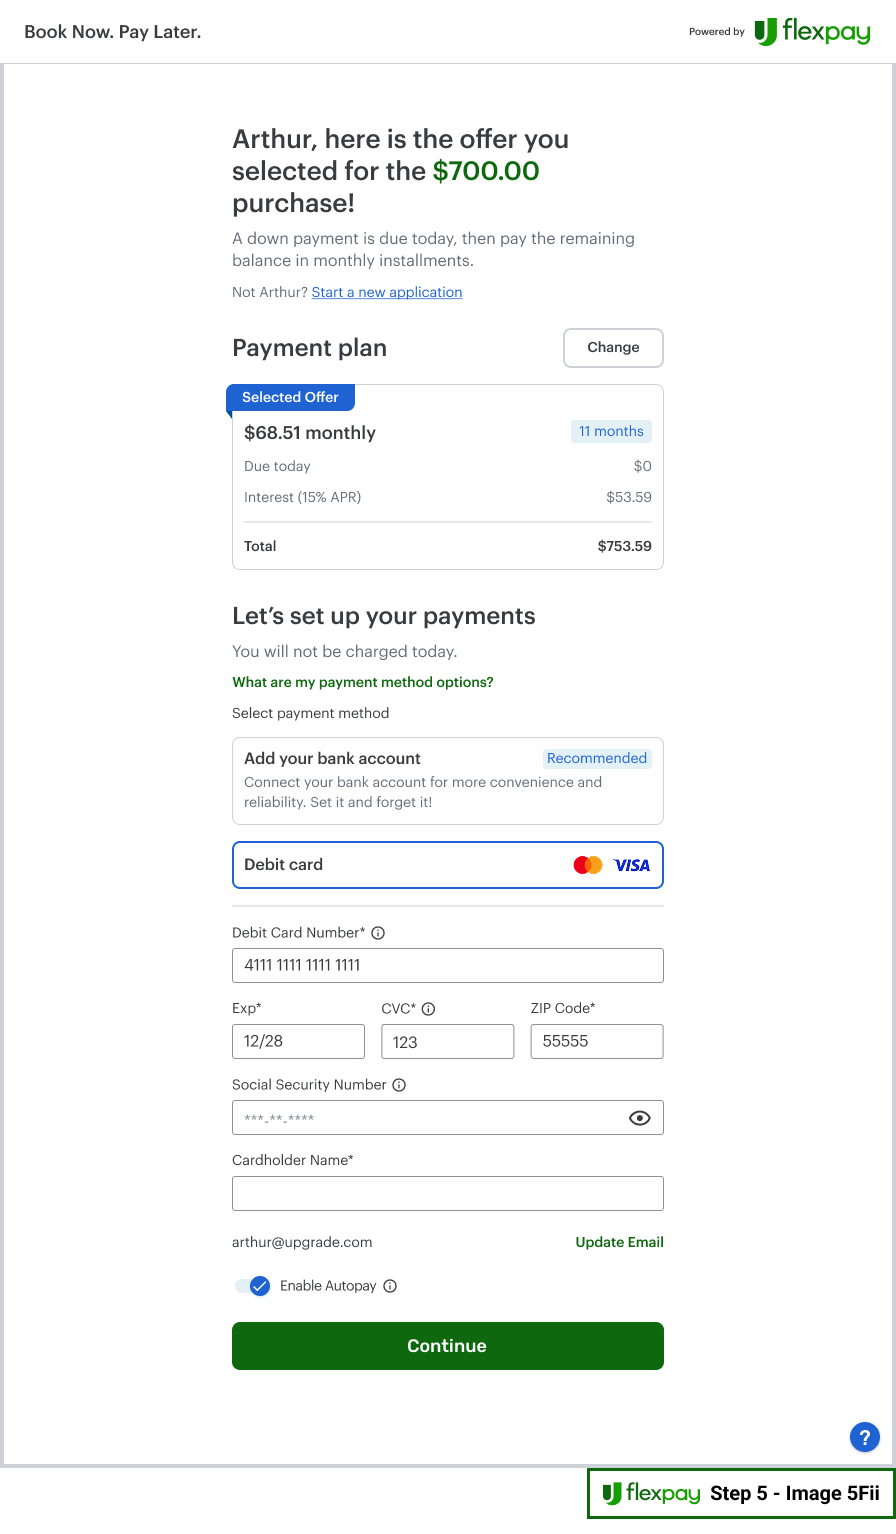
Note: In order to complete a transaction, the customer must then click the booking/purchase button on your website. The text in the screen above saying “Complete Booking” will be updated to reflect the text used on the button on your site.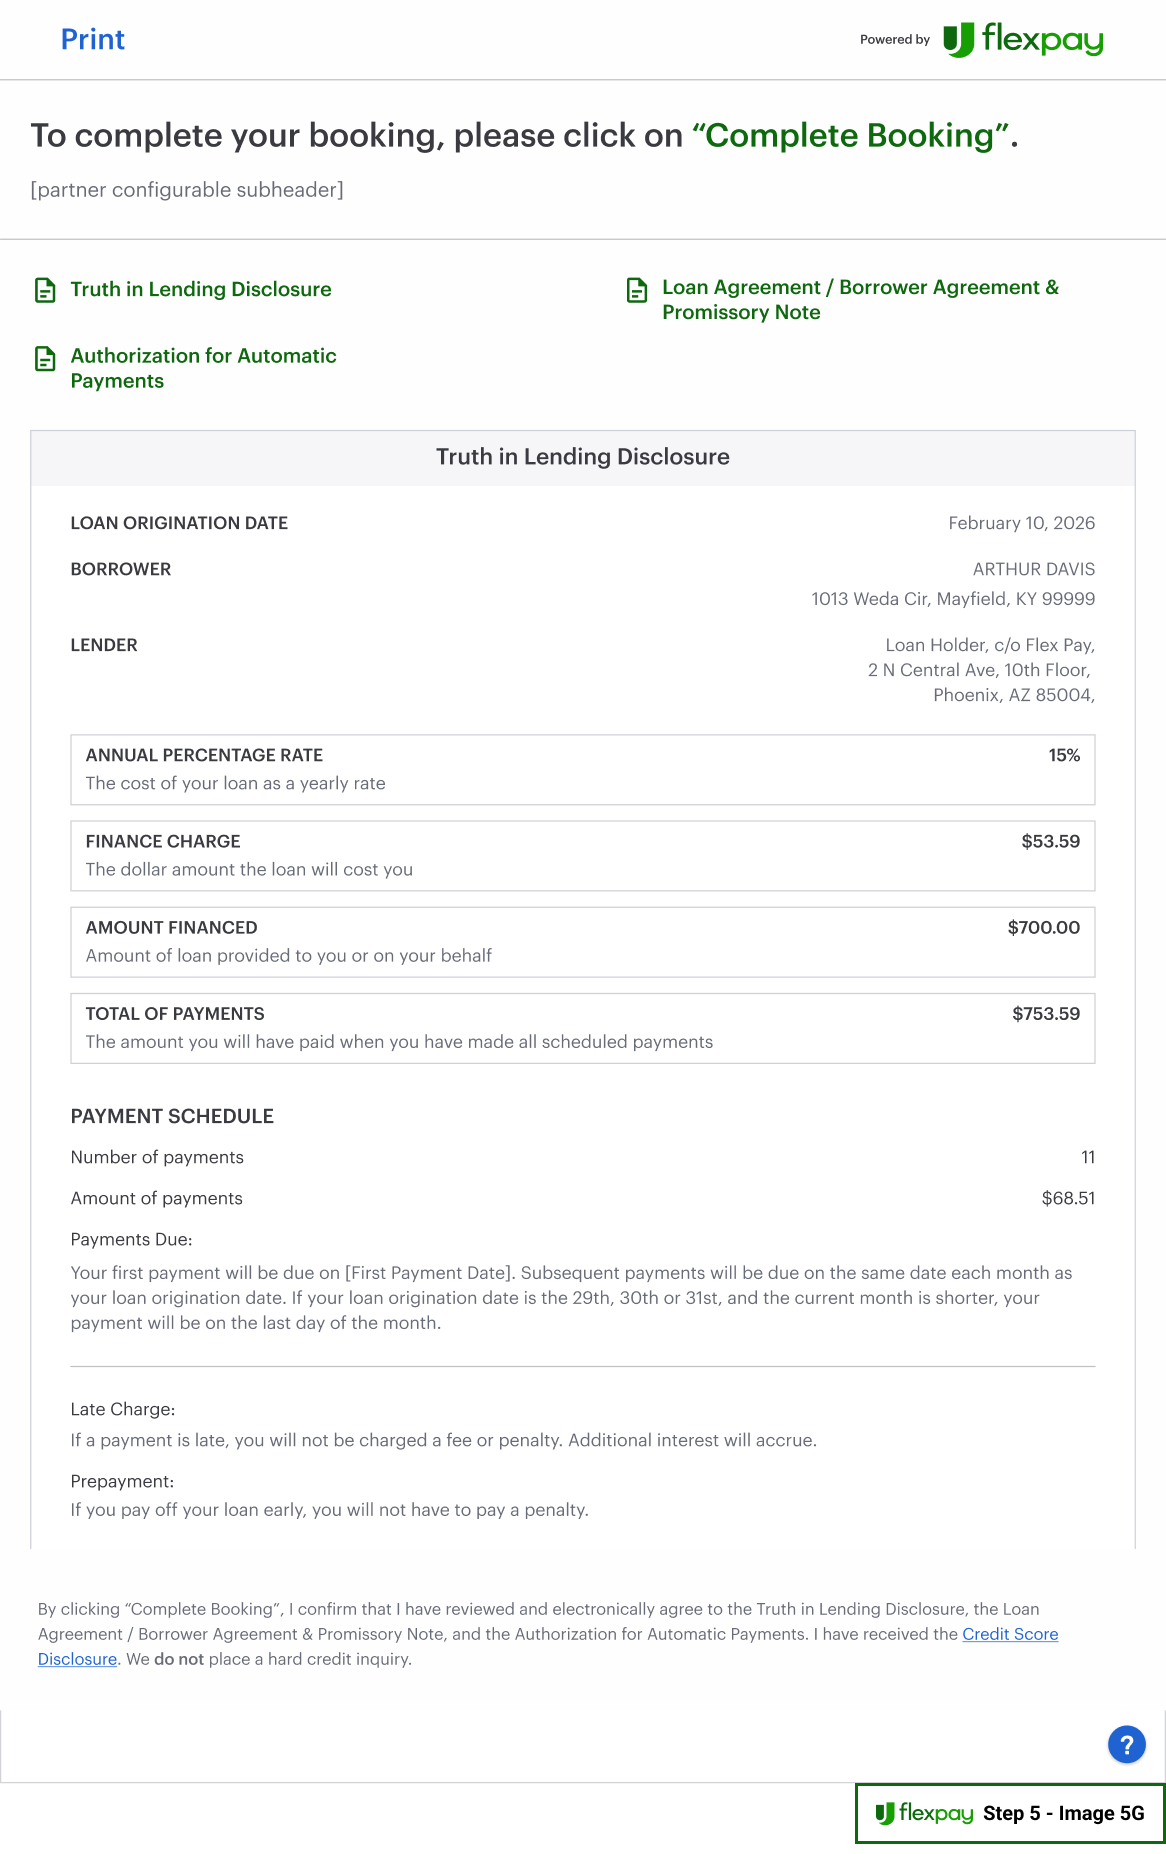
⚠️ Please reivew the Purchase Button page for a detailed view of the expected behavior.
⚠️ Note that
billing_contactcan be used on payment pages to pre-fill information in the Uplift application iFrame. Thus, while it is not required by any vertical with the exception of Retail, it is highly recommended to improve customer experience. - Once you have successfully completed the Uplift application flow, a token is made available within the callback method verifying completion of flow. Thus, you should see the console message we added earlier in your browser tool’s console as shown below.
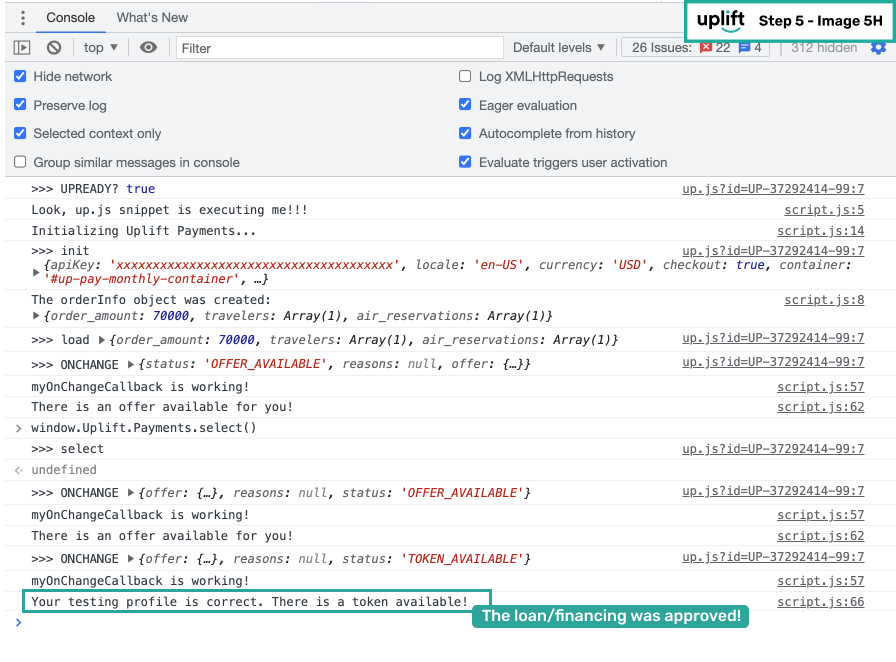
TOKEN_AVAILABLE: function(){ console.log("Your testing profile is correct. There is a token available!"); } - Update the
<!-- prepare a hidden container for the Uplift application iframe -->
<div id="up-pay-monthly-container" src="" style="display:none"></div>
<!-- you will attach here ^ the Uplift iframe if Pay monthly is available -->