Integration Details
⚠️ Note that steps 4 - 6 are exclusive to the payment page and are not required if working on a non-payment page. If you are working on a non-payment page integration, please move to the Enable User Interface Section to display the offers to your customers.
Once, the user has goes through the Flex Pay application through the iFrame, there are two potential outcomes:
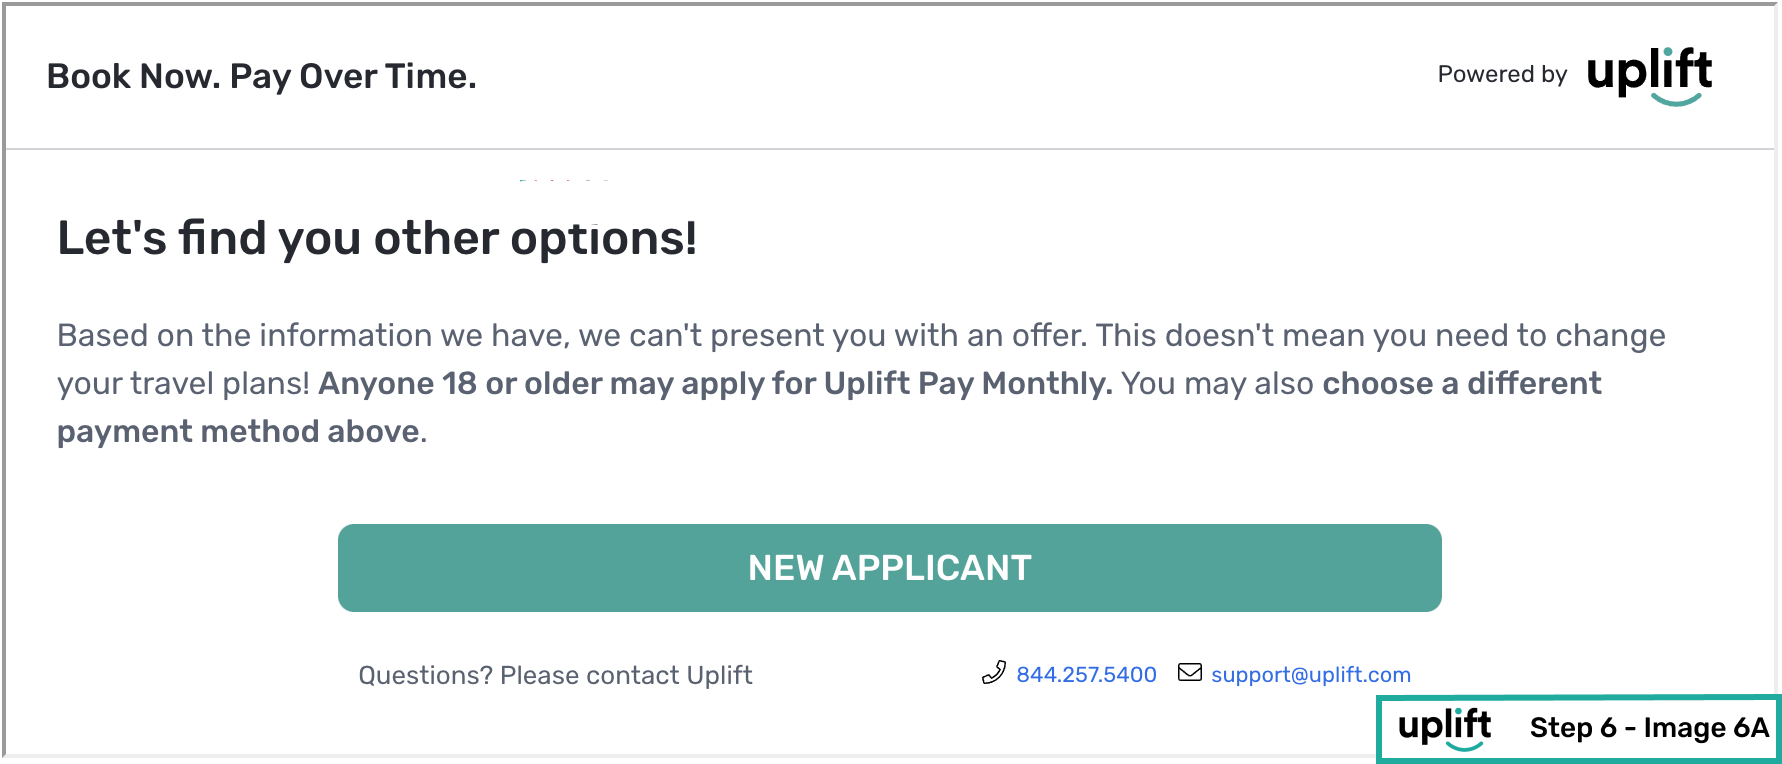
- Adverse action (the user has not been approved), in such a case:
- The iFrame will display a message to the user suggesting completing the purchase with an alternate payment method.
- The payment selector will remain enabled, however the user will be unable to continue with the Flex Pay application.
- The callback handler will not trigger a status change and it will remain as
OFFER_AVAILABLE. Due to compliance reasons we are unable to share the specific status of the loan application. An example of an adverse action on the iFrame will look like the image below.
Note: In the image above, for travel partners, if an applicant is declined then they will be prompted with a button to start a fresh application for a new user.
- Successful application (the user has been approved), in such a case:
- The callback handler will fire a
TOKEN_AVAILABLEstatus signaling that a token object (containing the details of Flex Pay virtual card similar to any bank card) is available for the merchant to process your payment.
⚠️ Make sure to obtain the available token ONLY AFTER the user clicks on the booking/purchase button on your website.
In order to retrieve the token, you will need to call the
window.Uplift.Payments.getToken()method. This method does not take any parameter and makes a request to the Uplift platform to send the token object. - Once the **token** has been sent by Flex Pay, the callback handler will fire a
TOKEN_RETRIEVEDstatus with the token as an attribute of the response. This token object can then be used to process payment similar to any other bank card. The Virtual Credit Card, also known as a token, should not be stored.📘 Detailed attributes of the token and how to get paid using it can be found here.
⚠️ Please review the Response Reason Code details if the token value is NULL.⚠️ IMPORTANT. Do not store or display the tokenOnce the token is obtained, it is essential to ensure that card information is neither stored nor displayed in any format, such as:
- Billing Contact Form
- Credit Card Form
- Window Object
- Confirmation Page (last 4 digits)
How to correctly retrieve the billing contact information?⚠️Please make sure to use the data under the token.contact object instead of any other billing information provided by the user.
Below is an example of the updated callback handler with the above mentioned changes.
function myOnChangeCallback(response) { var statusHandlers = { OFFER_AVAILABLE: function(){ //Uplift Pay Monthly Offer available for this customer. }, TOKEN_AVAILABLE: function(){ //Uplift application has been completed and ready to pay in full. //Retrieve the token ONLY AFTER Purchase/Book button is clicked. window.Uplift.Payments.getToken(); }, TOKEN_RETRIEVED: function(){ //Uplift Payment Token successfully retrieved. var token = response.token; //process payment using token (uplift virtual card). }, OFFER_UNAVAILABLE: function(){ //Uplift Pay Monthly Offer is not available for this customer. }, SERVICE_UNAVAILABLE: function(){ //Uplift Payments Service is unavailable. } }; statusHandlers[response.status](); } - The callback handler will fire a
Error Reporting
If an error occurred while processing payment with the Flex Pay token that prevented a user from successfully booking or completing a purchase, please report it to Flex Pay using the error method.
window.Uplift.Payments.error(errorMsg: String)
This method has one parameter, errorMsg representing the booking error message shown to the user. The errors between the user confirming purchase and processing payment e.g. inventory no longer available, payment provider is down etc.
Reporting errors will help Flex Pay improve and better serve our mutual customers.
Processing Confirmation
To complete the confirmation process, one step is required for both Pay Monthly and other payment methods.
The following function should ONLY be executed on the Confirmation Page.
The window.Uplift.Payments.confirm(confirmationData: Object) function takes an object as a parameter, which consists of two attributes, is_pay_monthly and confirmation_id as shown below:
window.Uplift.Payments.confirm(
  {
    "is_pay_monthly": boolean,
    "confirmation_id": "string"
  }
)
The confirmation_id attribute is mandatory exclusively for Pay Monthly transactions, when is_pay_monthly is true.
Example

Pay Monthly
window.Uplift.Payments.confirm({
   "is_pay_monthly": true,
   "confirmation_id": "616783a0"
 })
Other Payment Methods
window.Uplift.Payments.confirm({
   "is_pay_monthly": false,
   "confirmation_id": "616783a0" //optional
 })
For Pay Monthly transactions, this method informs Flex Pay that the booking was successful and allows us to provide a better customer experience for our mutual customers, in case they call Flex Pay. For alternative payment options, this method allows us to deliver improved performance metrics.
📘 Since certain partners provide confirmation on the same payment page, while others have a separate confirmation page, before sending the confirmation number, please validate that you have already loaded the up.js code, defined the window.upReady and initialized the library using initPayMonthly for a non-payment page as explained in step 2.
⚠️ Please reivew the Purchase Button page for a detailed view of the expected behavior.
📌 Before launching Flex Pay on your Production site, please make sure to:
- Ensure the checkout page and payment behavior meets the requirements outlined in the Payment Status page
- Ensure you have reviewed and completed the QA Checklist
Step-by-step Validation Guide (Recommended)
- In order to receive and store the Uplift token, which includes the virtual card information, as a variable, you need to update the callback handler defined in Example Step 4 as shown below.
function myOnChangeCallback(response) { console.log('myOnChangeCallback is working!'); var statusHandlers = { OFFER_AVAILABLE: function () { //Uplift Pay Monthly Offer available for this customer. console.log('There is an offer available for you!'); }, TOKEN_AVAILABLE: function () { //Uplift application has been completed and ready to pay in full. //Retrieve the token ONLY AFTER Purchase/Book button is clicked. console.log('getToken'); window.Uplift.Payments.getToken(); }, TOKEN_RETRIEVED: function () { //Uplift Payment Token successfully retrieved. var token = response.token; console.log('This is your token', token); //process payment using token (uplift virtual card). }, OFFER_UNAVAILABLE: function () { //Uplift Pay Monthly Offer is not available for this customer. console.log('Sorry! The offer is unavailable...'); }, SERVICE_UNAVAILABLE: function () { //Uplift Payments Service is unavailable. console.log('Sorry! The Uplift service is unavailable...'); }, }; statusHandlers[response.status](); } - Then refresh the page and call
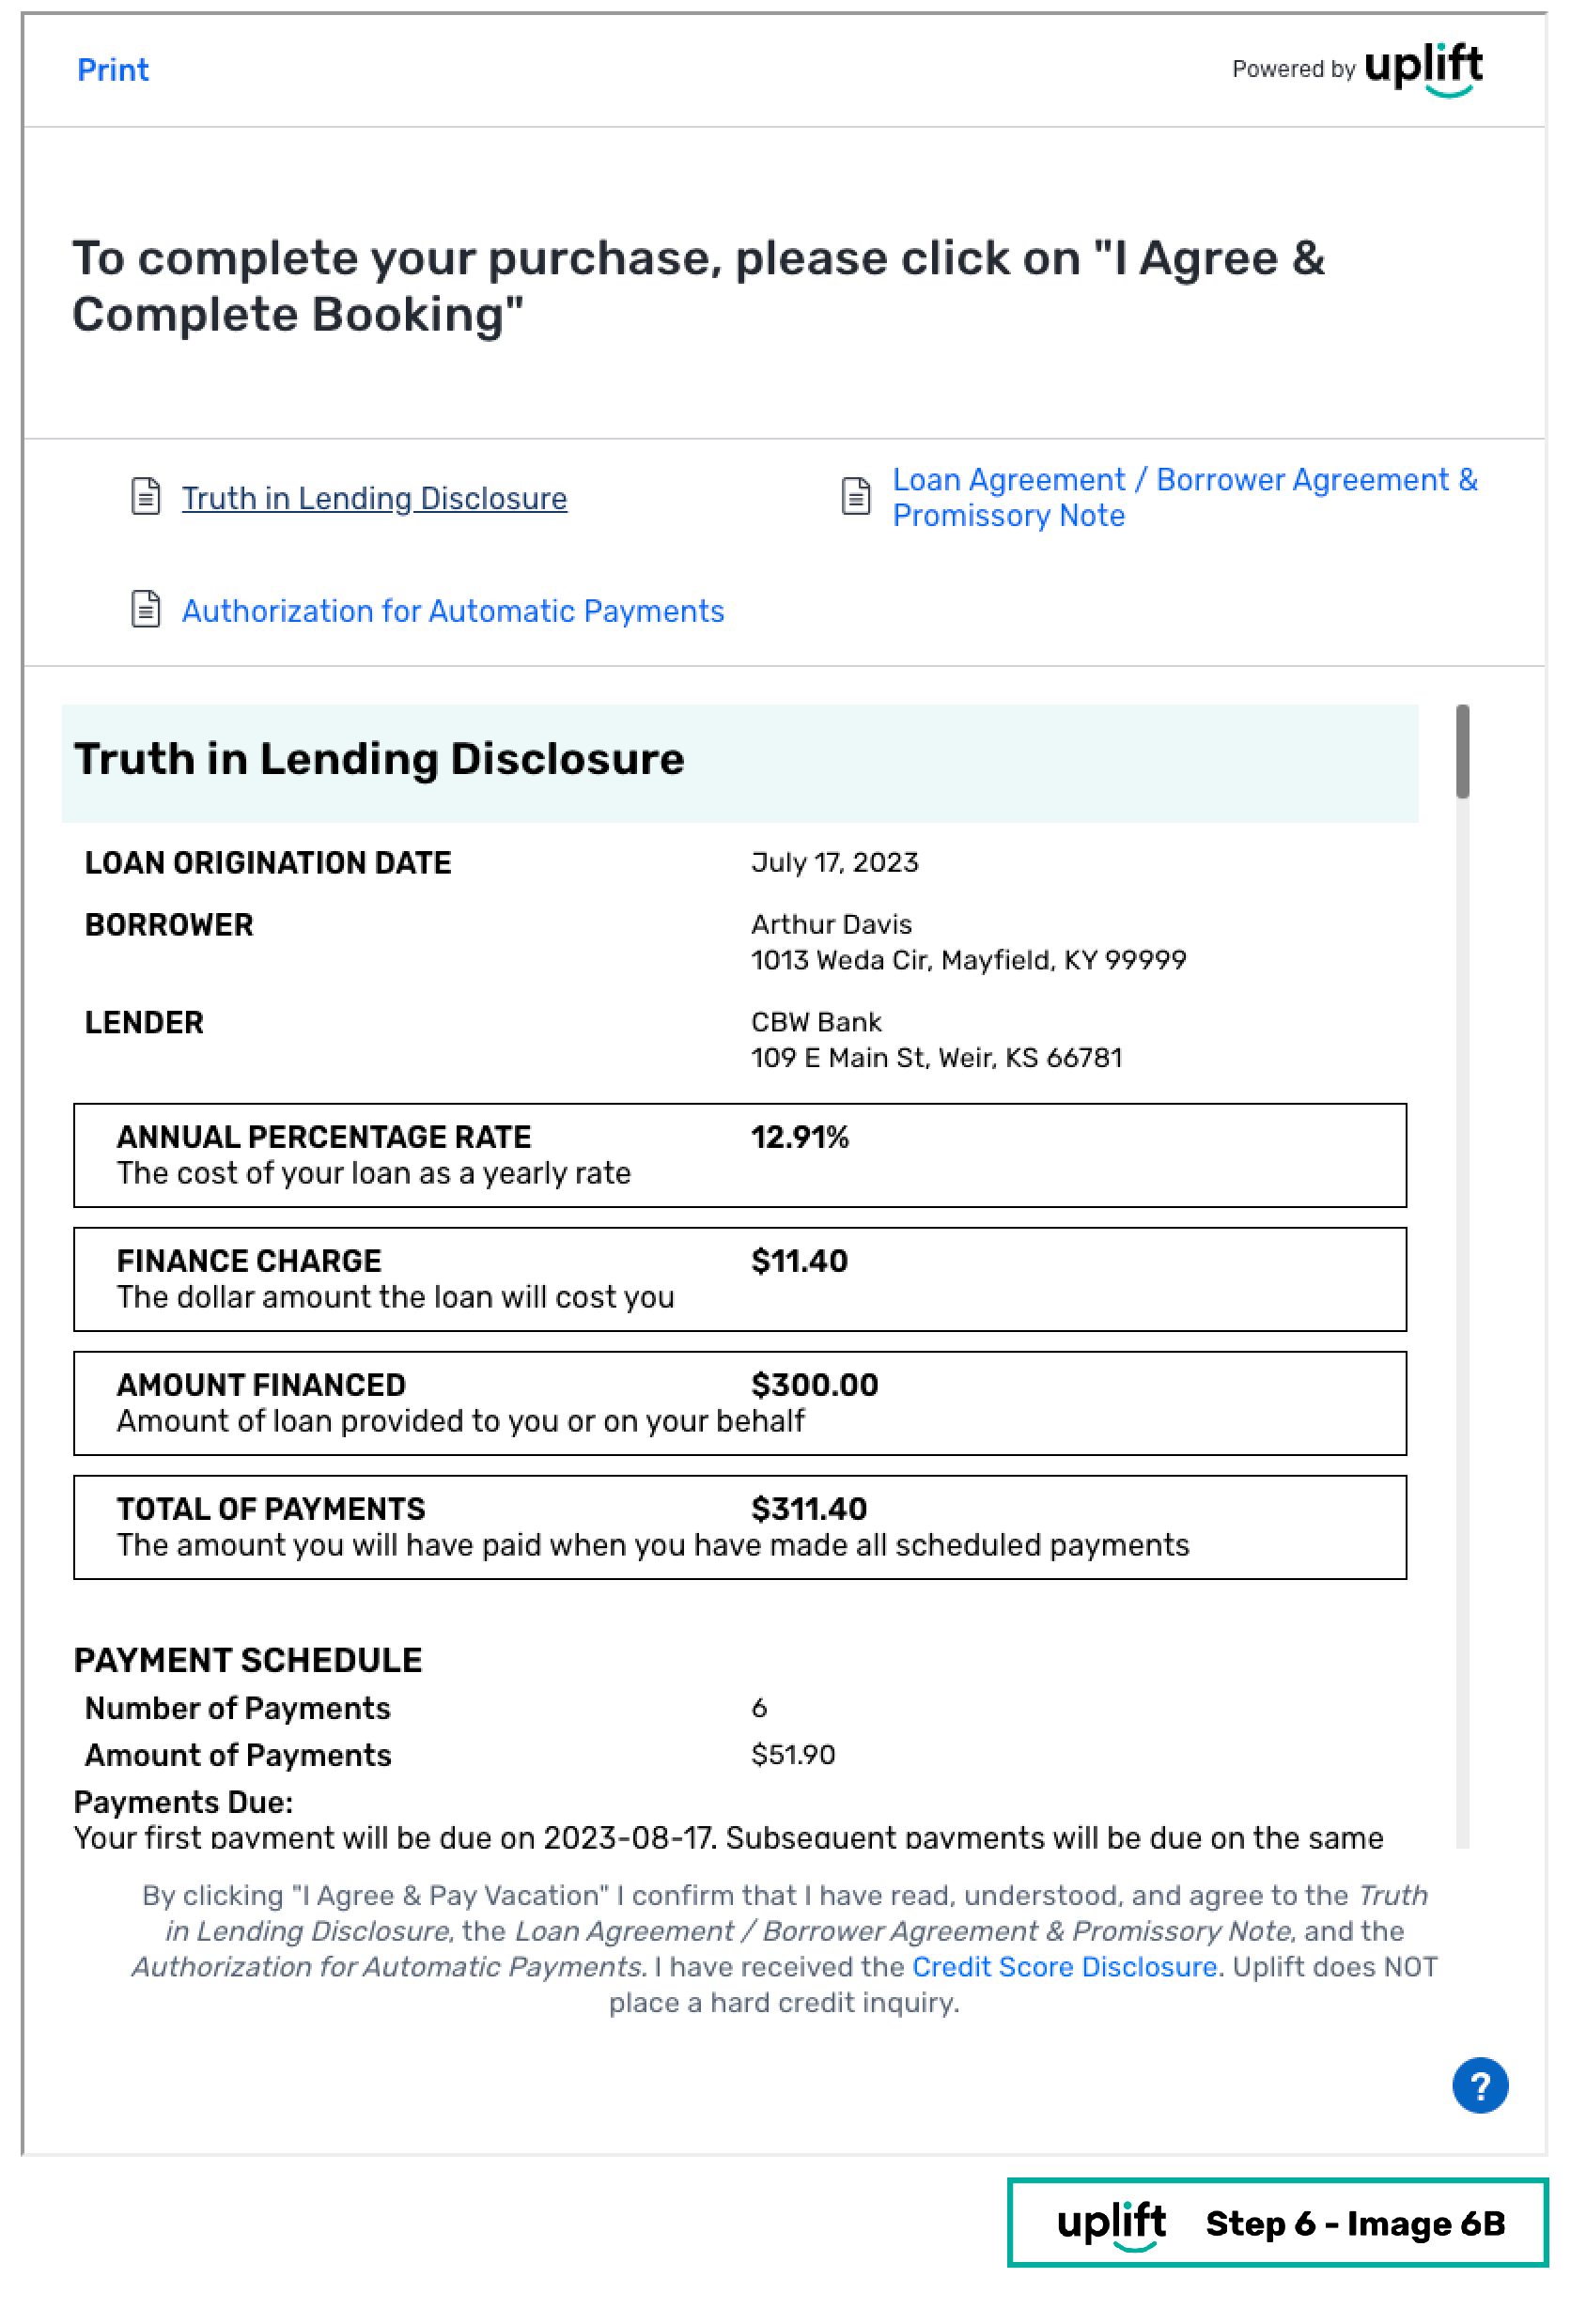
window.Uplift.Payments.select()from the console, you should once again see the Flex Pay application iFrame, then continue to test the iFrame using the provided testing profiles. For this following example make sure to use the approved outcome. On successful completion of application, you should end at the following screen.
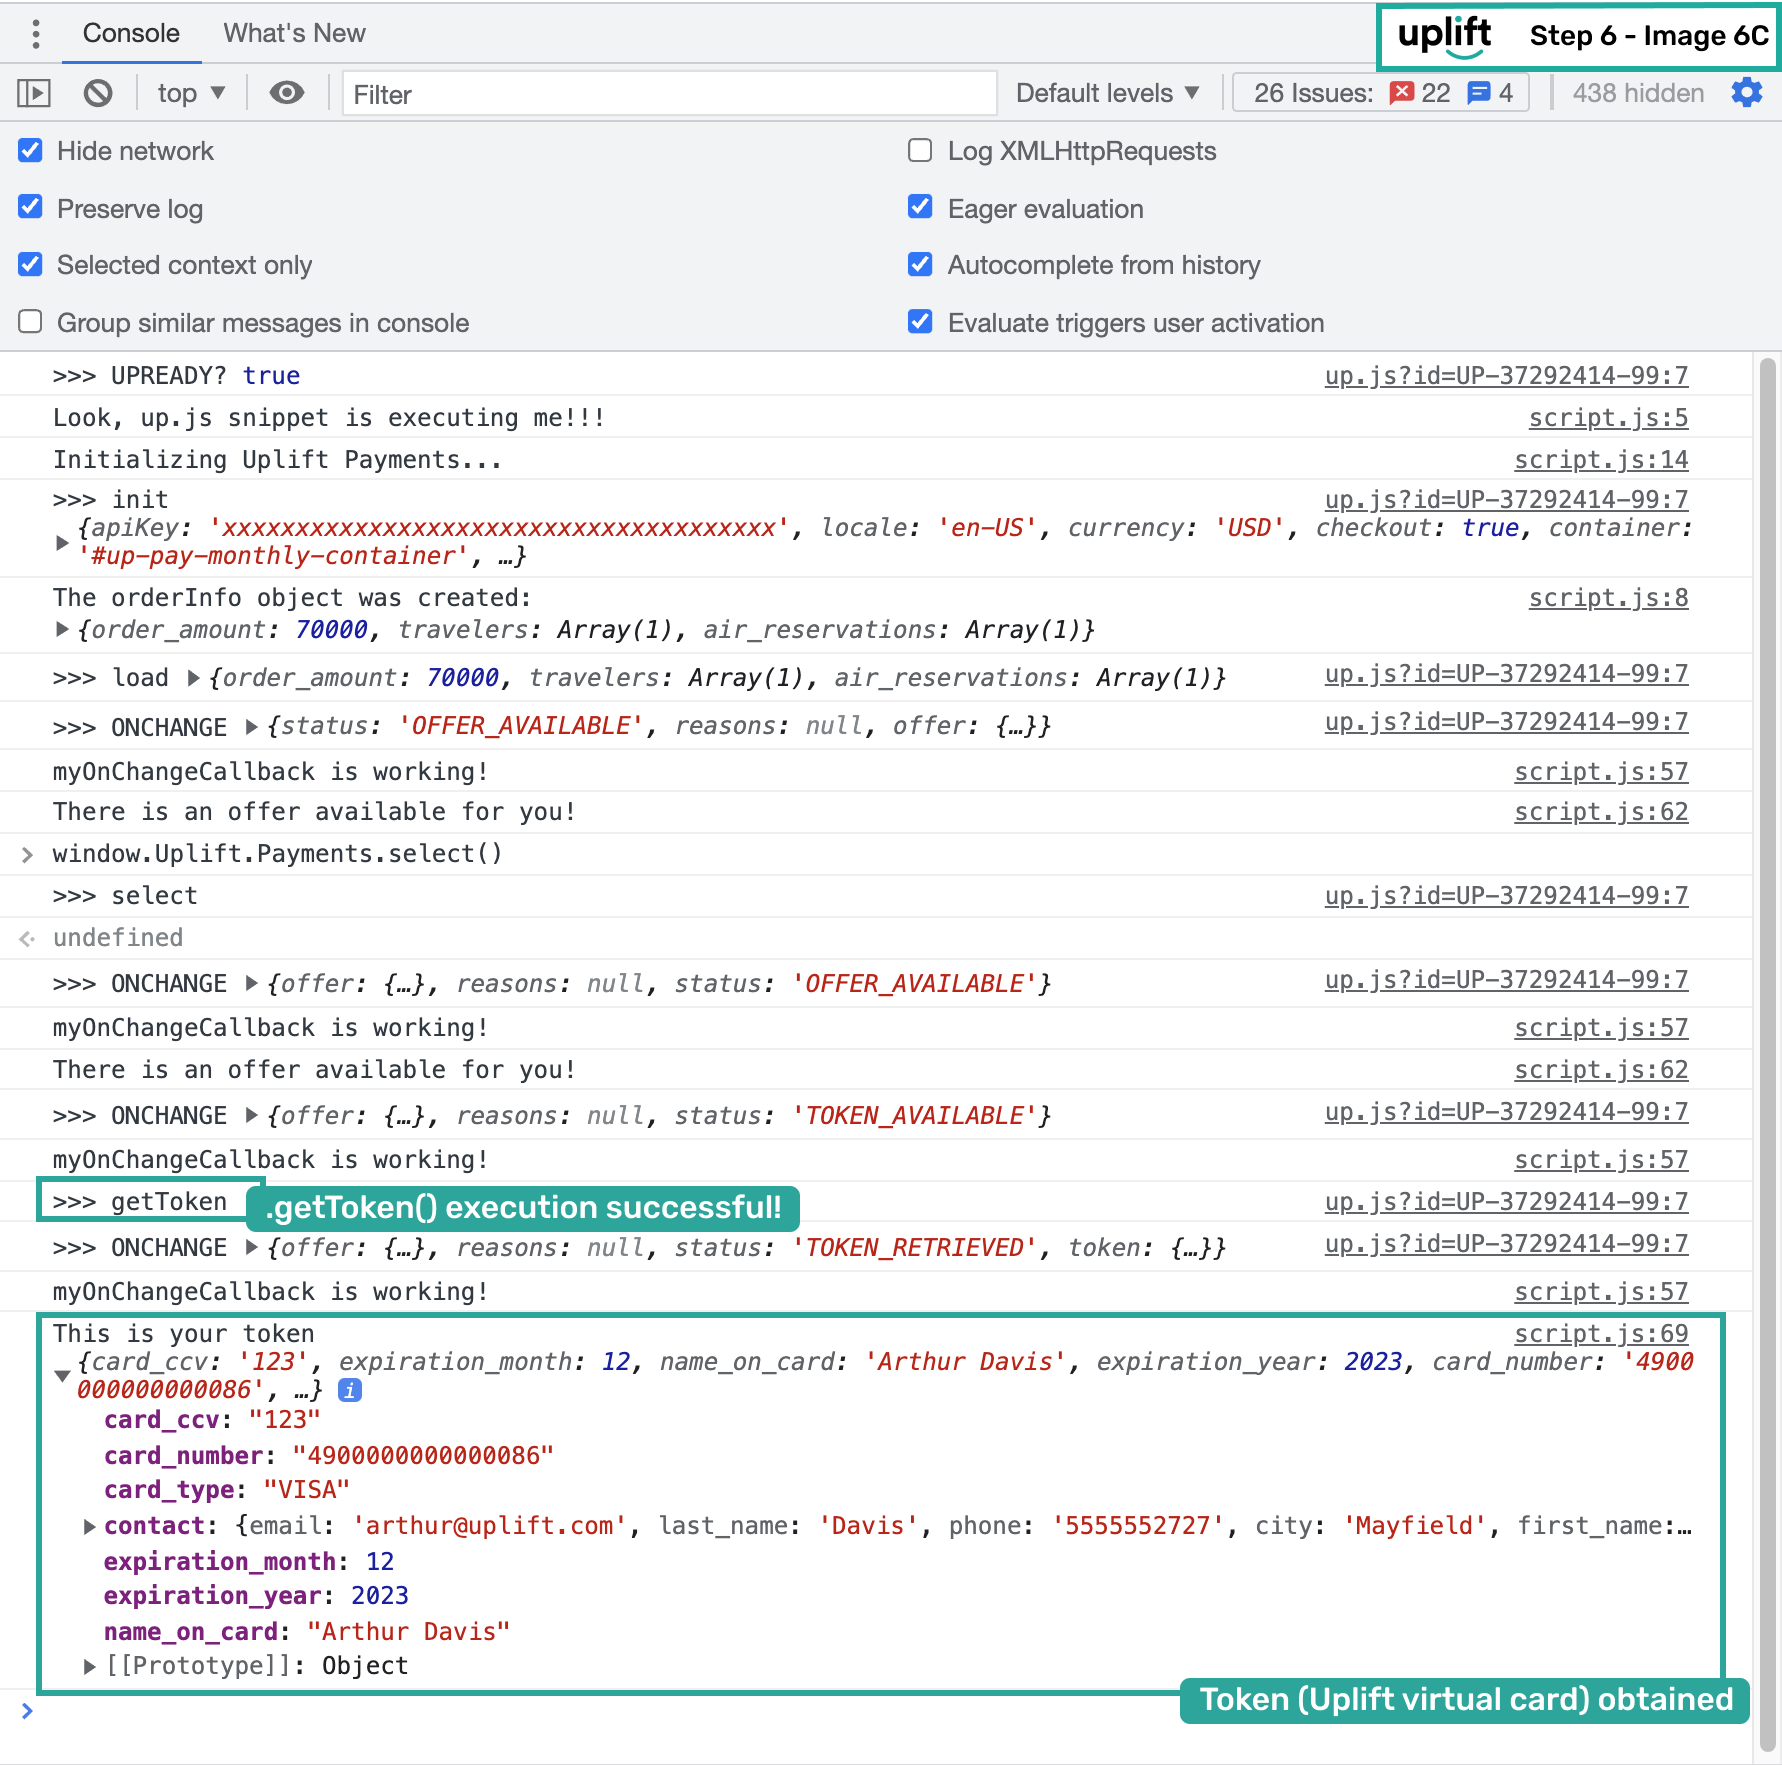
- Now, the updated callback handler should have sent a request for the token (Flex Pay virtual card) which when received will be logged on your browser developer tool’s console as shown below.

⚠️ Once you retrieve the token and have the virtual card information available as seen in the image above, you must then charge the virtual card as you would any other credit card in order to complete the transaction and process the payment in full.
- On successfully processing the payment using the Flex Pay token, the partner confirmation number should be sent to Flex Pay using the following methods with the example confirmation id as shown below.
window.Uplift.Payments.confirm({
    "is_pay_monthly": true,
    "confirmation_id": "ConfirmationID123"
  })
Note the "ConfirmationID123" in the sample code above represents the unique confirmation created by your internal systems. Sharing this with Flex Pay will allow us to support our shared customers' better with any inquiries they might have.
🎉 You have now successfully implemented the Flex Pay API. Move on to the next section to integrate user interface messaging to display payment selectors and Uplift’s offerings and application to your customers.
⚠️Now that you have completed the example integration do not forget to update your UP-code to use the Production code and remove any unnecessary console logs that were used for development.
📌 Before launching Flex Pay on your Production site, please make sure to:
- Ensure the checkout page and payment behavior meets the requirements outlined in the Payment Status page
- Ensure you have reviewed and completed the QA Checklist