Overview
⚠️ Steps 4-6 are exclusive to payment pages. If you are building a non-payment page, skip to the Enable User Interface Section to configure your <up-from-pricing> components.
The Pay Monthly iFrame is Flex Pay's fully embedded application that lets customers apply for monthly financing without leaving your site. One hidden <div>, two SDK methods, and you are done.
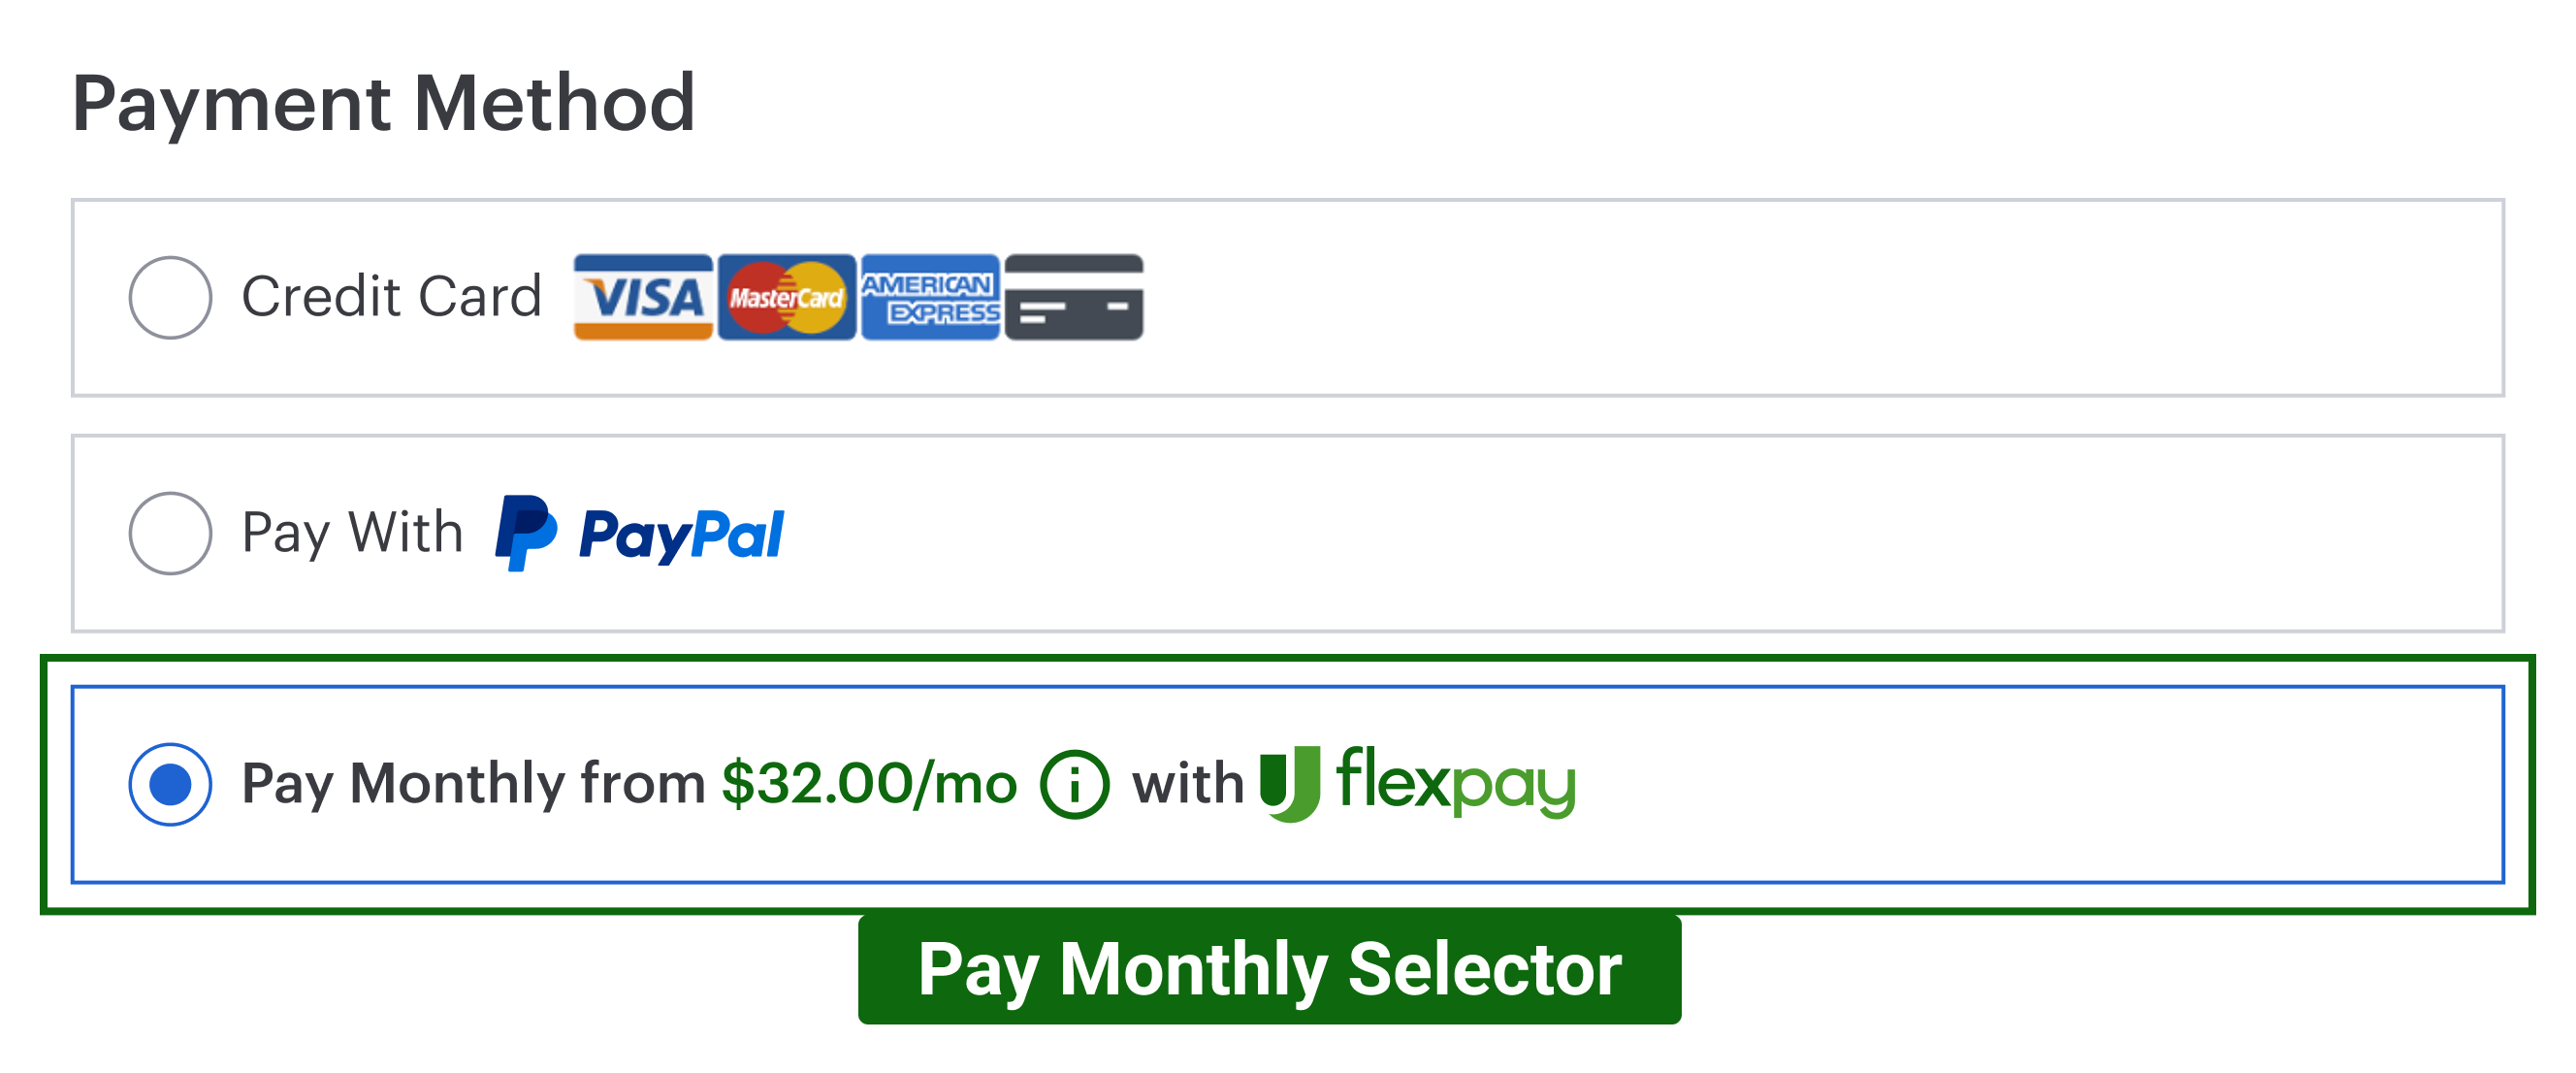
📘 The Flex Pay Pay Monthly Selector is an embeddable HTML element that allows users to select Flex Pay as their payment method. The iFrame described below is usually placed under the Pay Monthly Selectors. See Pay Monthly Selectors for details.
Integration Details
Add a hidden container element where the iFrame will be injected:
<!-- prepare a hidden container for the Uplift application iframe -->
<div id="up-pay-monthly-container" src="" style="display:none"></div>
<!-- you will attach here ^ the Uplift iframe if Pay monthly is available -->
⚠ Avoid nesting this container inside another iFrame. The Flex Pay iFrame must be a direct child of your page.
⚠️ Important considerations:
- The container id (
up-pay-monthly-container) must match thecontainervalue passed toinitin Step 2. - Set the container's viewport height to maximum - the iFrame adjusts to fit the available space.
Select and Deselect
The iFrame starts in a hidden, paused state. The SDK provides two methods to control it:
1. Select Pay Monthly - window.Uplift.Payments.select()
Call this when the customer selects Flex Pay as their payment method. It resumes the iFrame, but you handle the show/hide of the container element (#up-pay-monthly-container) yourself.
Also use select() on navigation when a customer returns to the payment page after previously choosing Flex Pay.
2. Deselect Pay Monthly - window.Uplift.Payments.deselect()
⚠️ Only call deselect() if Flex Pay was previously selected. Do not call it when switching between non-Flex Pay methods (e.g. Credit to Debit).
Call this when the customer switches away from Flex Pay. Remember to hide the container element every time you deselect.
We recommend defaulting to an alternative payment option. If you want Flex Pay pre-selected, call window.Uplift.Payments.select() on load to validate availability.
📘 select() and deselect() are independent of window.Uplift.Payments.load(orderInfo). Do not call load as part of select/deselect operations.
⚠️ Review the Purchase Button page for the expected button behavior during the Flex Pay flow.
From Pricing on Payment Pages
If your payment page also includes <up-from-pricing> components (for example, inside a Pay Monthly selector or near the order summary), they work alongside the iFrame without any extra configuration. Both share the same internal bridge and order context established by load(orderInfo) in Step 3.
Step-by-step Validation Guide (Recommended)
- Add the hidden container to your page:
<!-- prepare a hidden container for the Uplift application iframe -->
<div id="up-pay-monthly-container" src="" style="display:none"></div>
<!-- you will attach here ^ the Uplift iframe if Pay monthly is available -->
-
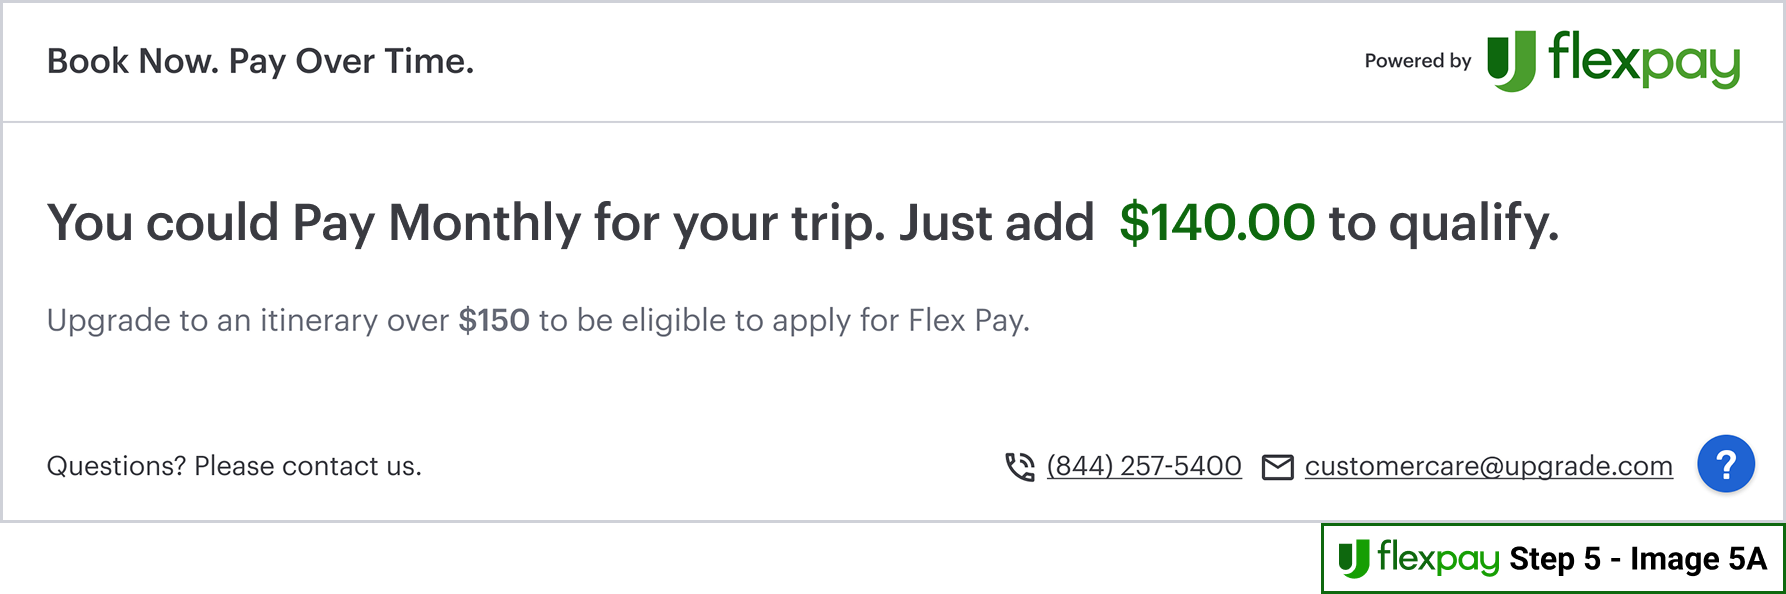
Test with an unavailable offer to see the fallback behavior:
- Confirm
orderInfo.order_amountis1000($10.00) from Step 4 testing. - Refresh the page.
- In the console, run
window.Uplift.Payments.select()and unhide the container. The iFrame should show a non-qualifying message:
- Confirm
-
Test with an available offer to see the full application flow:
- Update
orderInfo.order_amountto70000($700.00). - Add a console log to the
TOKEN_AVAILABLEhandler:
- Update
TOKEN_AVAILABLE:
function(){
  console.log("Your testing profile is correct. There is a token available!");
}
-
Refresh the page.
-
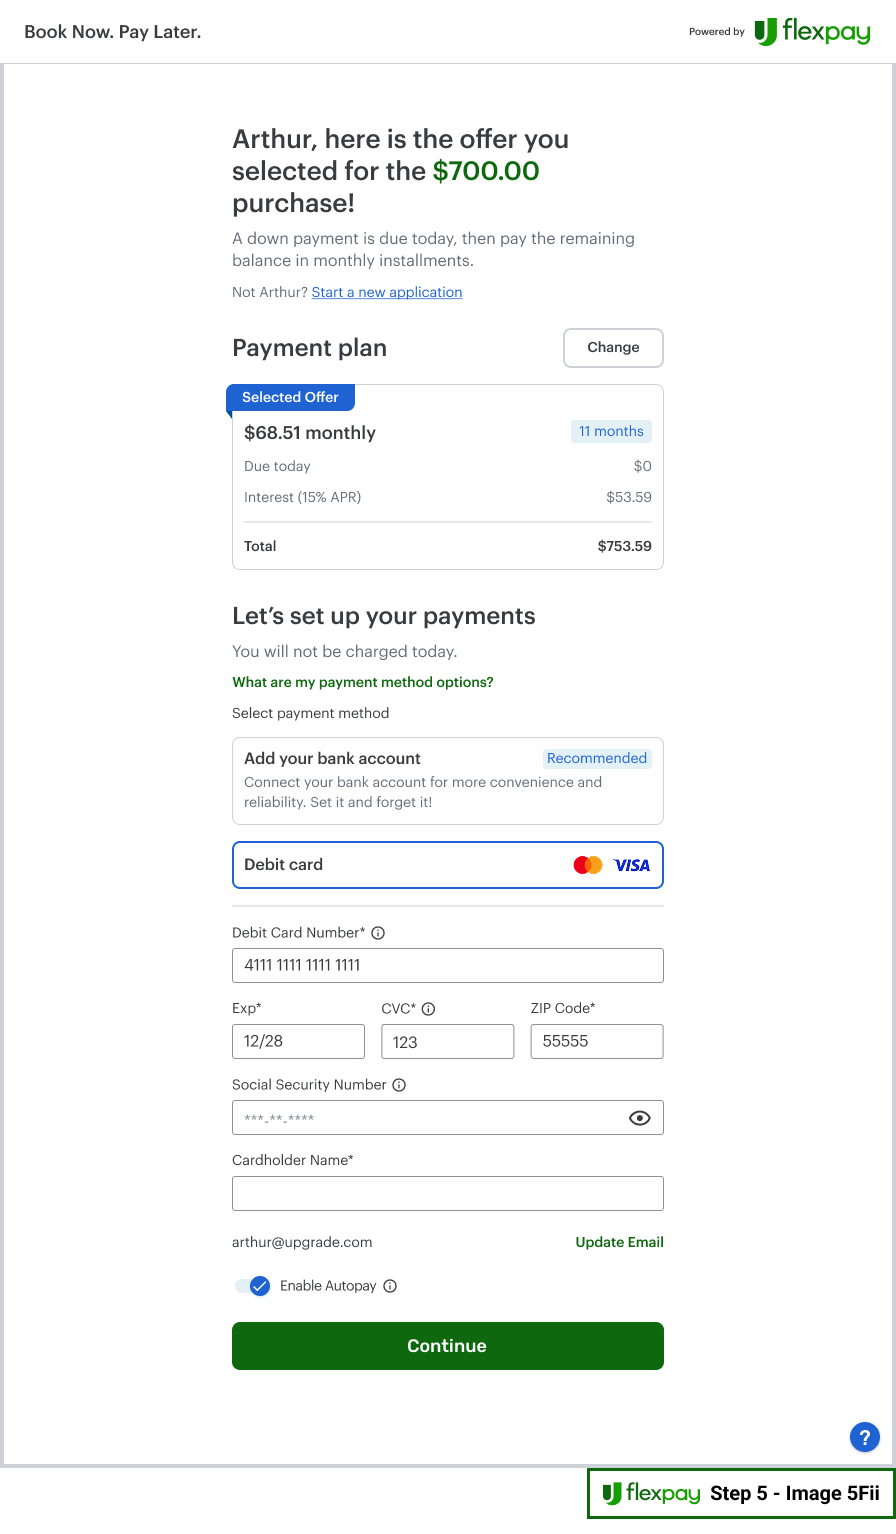
Run
window.Uplift.Payments.select()in the console and unhide the container. You should see the Flex Pay application: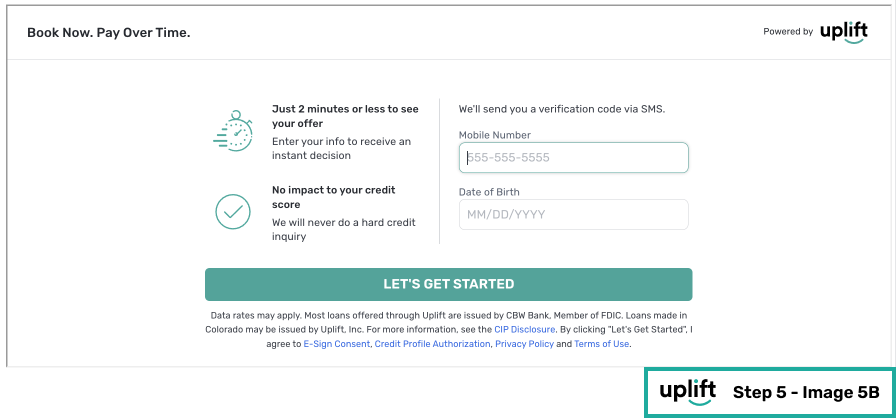
-
Complete a test application using the provided testing profiles. Follow the approved outcome flow:
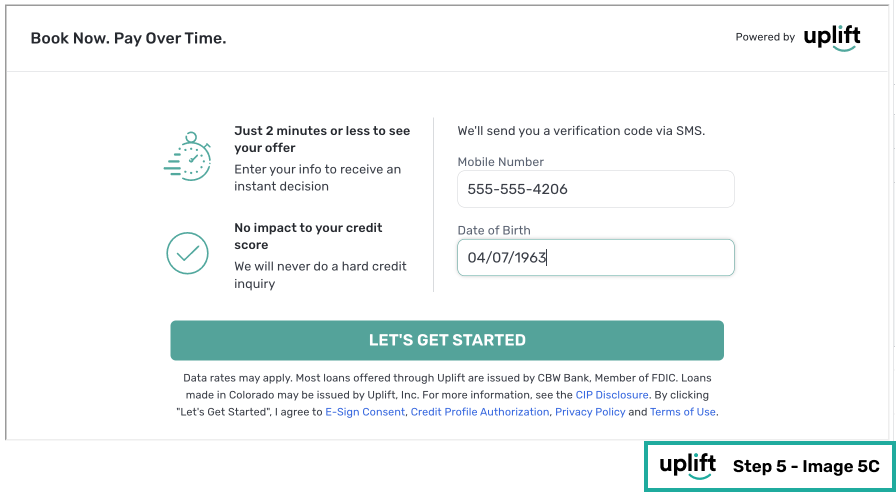
Note: The 5-digit verification code is included in the testing profiles.
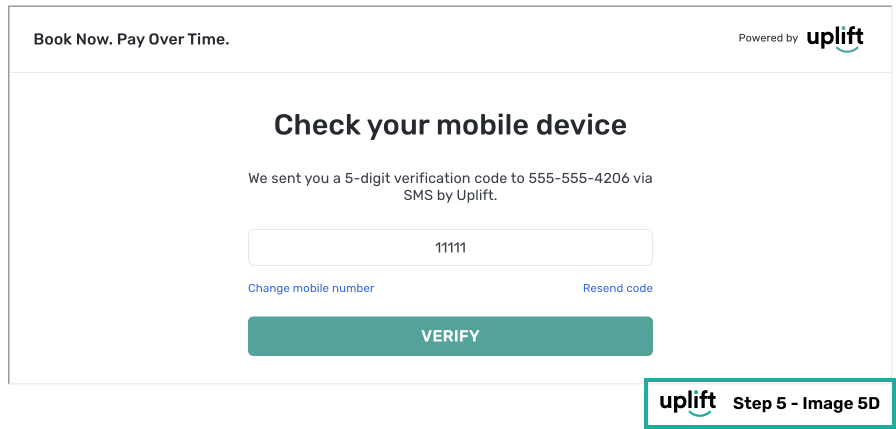

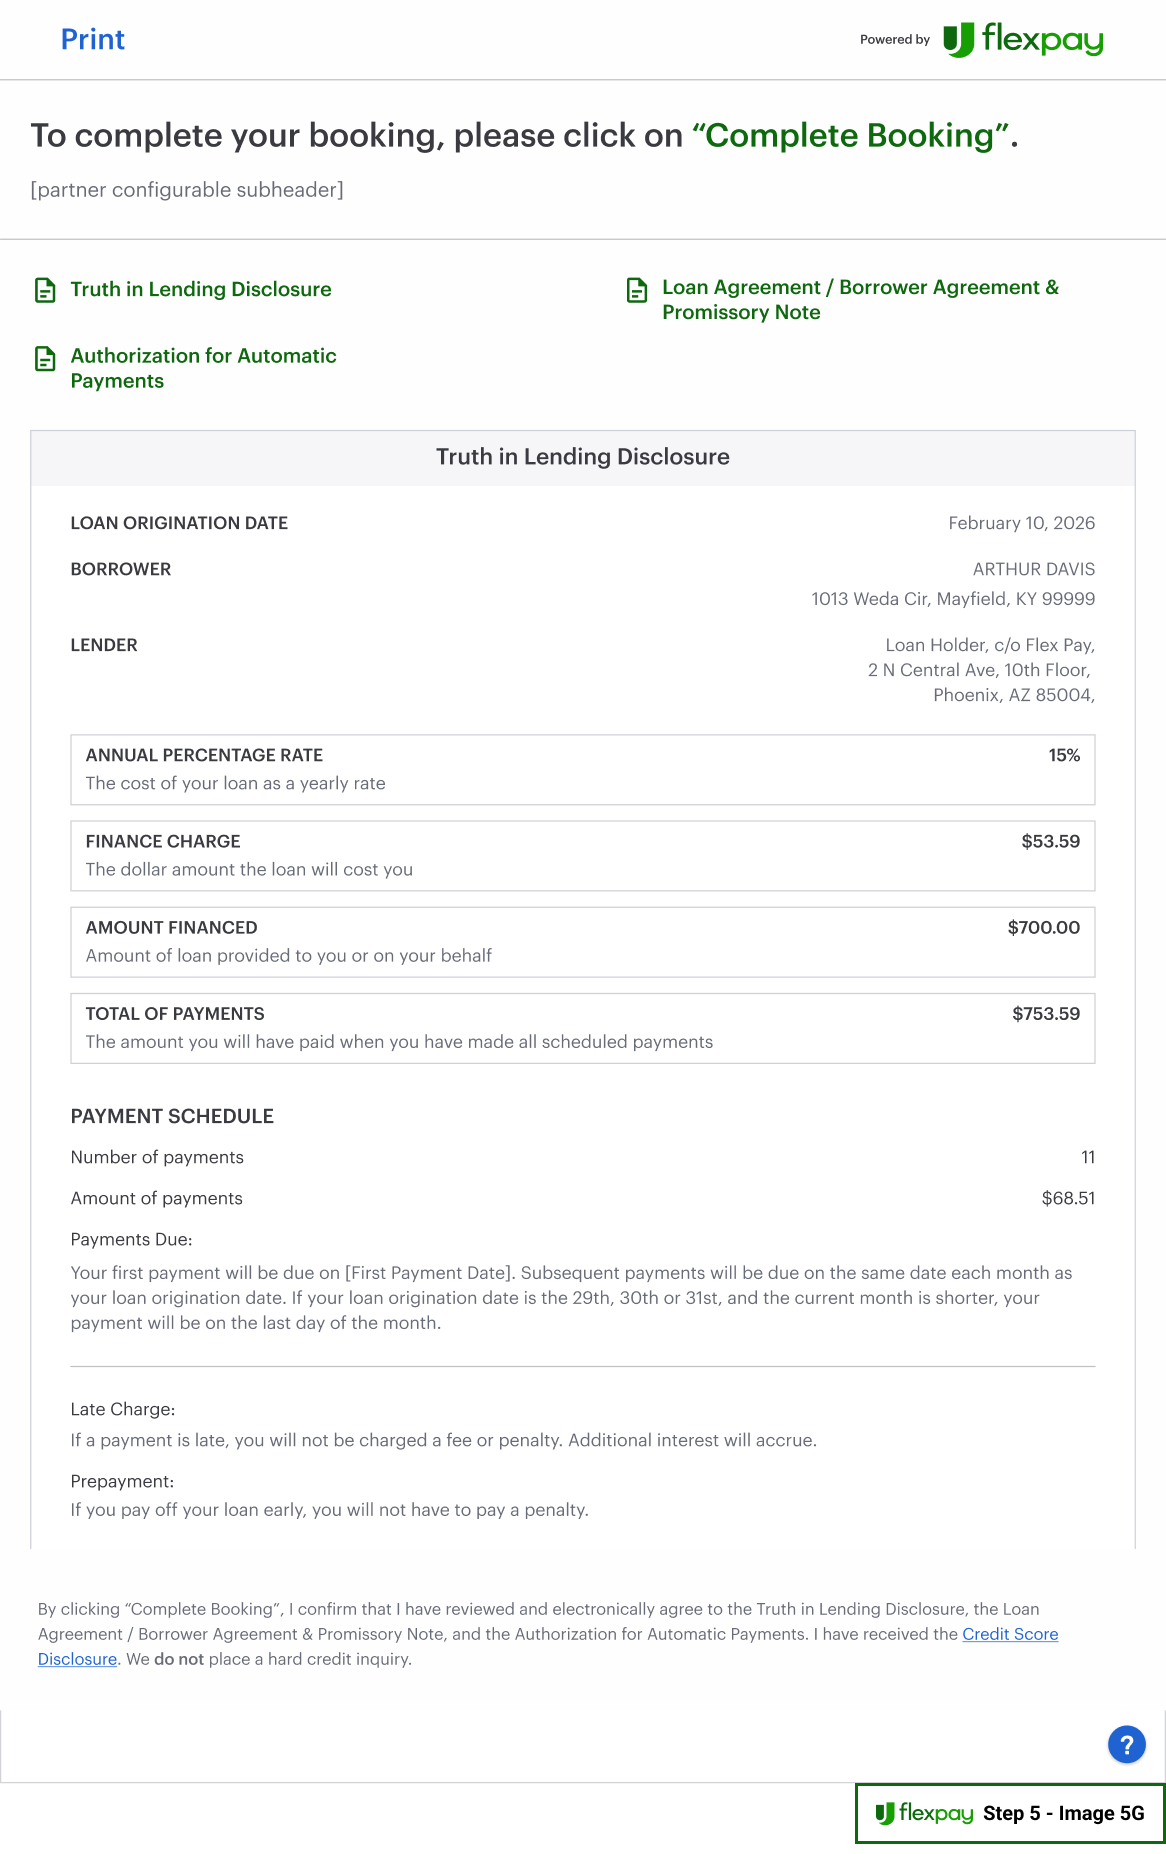
Note: The "Complete Booking" text in the iFrame will reflect the actual button text on your site.
⚠️ Review the Purchase Button page for the expected behavior.
⚠️
billing_contactcan be used on payment pages to pre-fill information in the Flex Pay iFrame. While not required for most verticals (except Retail), it is highly recommended to improve the customer experience. -
After completing the application, the
TOKEN_AVAILABLEcallback should fire. Check the console: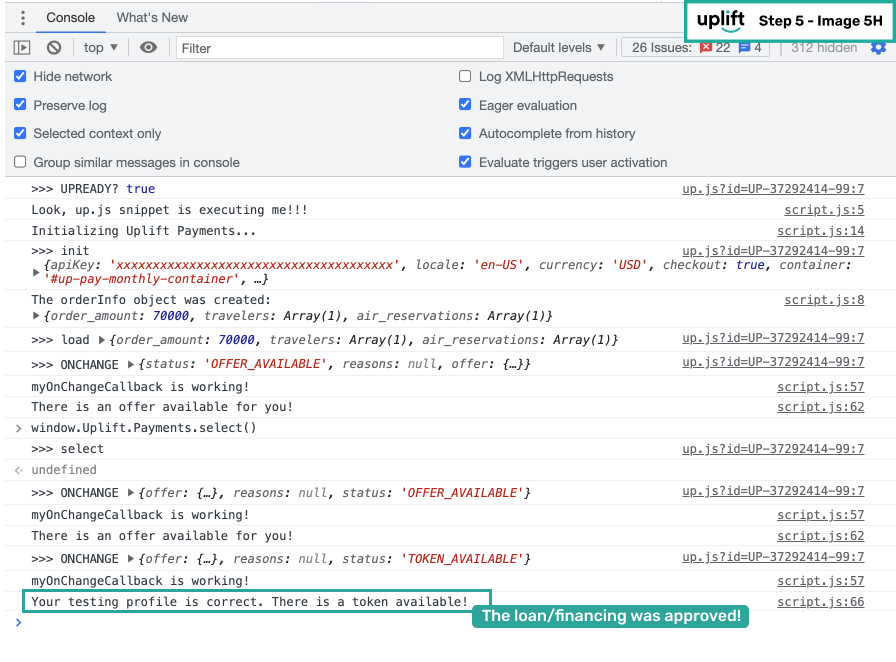
Continue to Step 6: Receive Payment to retrieve and process the Flex Pay virtual card.